The technique for putting a reverse appliqué into jersey or T-shirt material, however, is a little different from your run-of-the-mill reverse appliqué, and the technique for putting a reverse appliqué into a narrow piece of material, such as a sleeve or a pants leg or even a small child’s T-shirt, is trickier yet. Here, though, is exactly how to go about it: You will need:
T-shirt or jersey-knit pants with small stains or holes Cotton or flannel fabric in a desired color or pattern for the appliqué (you can use more jersey fabric for a very small appliqué, but the added stiffness of quilting cotton or flannel will give your appliqué extra sturdiness and support) Matching thread Lots of straight pins Iron set to cotton setting Sewing machine with a ballpoint needle and a freehand stitching presser foot installed (don’t forget to lower your feed dogs!) small scissors with a sharp point
- Lay out your clothing that needs the applique, and the fabric you’ll be using for the applique, and iron them both nice and flat.
- Cut out a piece from your applique fabric that’s significantly larger than the finished size you’ll want your applique to be, but that will still fit within the sleeve or pants leg where you’ll be putting it.
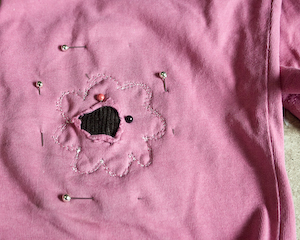
- Put the applique fabric inside the shirt sleeve or pants leg, directly under where you want your applique to be. You’ll want to smooth out your applique fabric inside the article of clothing, and pin it to your fabric around both the inner and outer perimeters of your applique border. Slipping a piece of cardboard or plastic under your applique fabric can help keep you from pinning both sides of the shirt sleeve or pants leg together–you definitely don’t want to do that.
- If you’re using a freezer paper stencil or silhouette, iron it down. You can also trace or even draw a freehand shape–remember, though, that you’ll be cutting just outside the lines that you draw, and stitching about 1/8 of an inch outside of them.
- Set your sewing machine to a wide, loose stitch (this will keep the jersey fabric from puckering) and make sure that you have your freehand stitch presser foot installed and your feed dogs lowered. If you’ve had to feed a sleeve or pants leg onto the free arm of your sewing machine, you don’t have enough room to rotate your article of clothing around your needle for 360 degrees. Fortunately, the freehand presser foot will let your move the fabric in any direction as you sew–it’s also a must to keep your jersey fabric from puckering.
- Sew around your applique two or three times–since you’re using a wide, loose stitch, you need the extra reinforcement.
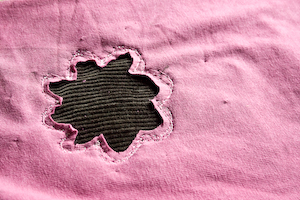
- Using your small, sharp scissors, very carefully cut away the T-shirt material within that stitching, about 1/16th of an inch inside the stitching. The first time you wash it, that little bit of material left will curl up a little and neatly frame your applique. Be VERY careful that you don’t cut your applique material, that quilting cotton or flannel that’s just underneath the T-shirt.
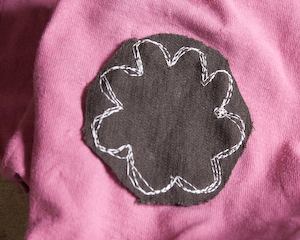
- Turn your shirt or pants inside out and cut away the excess applique fabric that lies outside the perimeter of your stitching. You can do a lot with the reverse applique–I use it sometimes to remove a prominant logo from a thrifted name-brand shirt, or to add a matching element to make complementary outfits for my daughters, or even, using a sturdy applique material like denim or corderouy, to repair a hole in a flimsy little pair of pants and make it sturdier than it was before.