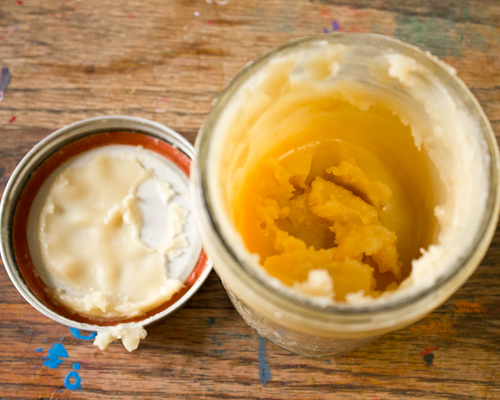
Beeswax is good for so much more than just candlemaking and nature crafts. In particular, beeswax is an ingredient that I find myself using often in my homemade natural cleaning supplies. From my antique library table to my unfinished wood kitchen countertops to my children’s many wooden toys (especially the hand-stained wooden toys), my homemade beeswax wood polish keeps them all in good condition, with all-natural ingredients and scented with essential oils. Here’s my recipe: The general ratio for beeswax wood polish is one part beeswax to three or four parts oil. I use a 1:3 ratio, because I like a polish that’s a little more solid. Even at 1:3, however, the polish is still quite soft, easy to dip into by hand and easy to spread. For oil, you may use any oil that you prefer, as long as it’s shelf-stable. I use the same low-quality olive oil that I use in soapmaking, but other possibilities are coconut oil and jojoba oil–I imagine that you could even use Crisco if you had a mind to. To make enough wood polish to last my family a year, I first heat 1/3 cup of beeswax until melted. In my opinion, the easiest and safest ways to melt beeswax are in a crafts-dedicated crock pot (which you can find at a thrift store) or in a crafts-dedicated double boiler. If you fix yourself up a DIY double boiler, however, then you can melt your beeswax right in whatever glass jar you’ve chosen to hold the beeswax polish, saving yourself an extra step and a dirty dish. As soon as the 1/3 cup beeswax is melted, combine it with one cup oil, directly into the jar that you’ll be using to store the beeswax wood polish. I use wide-mouthed jam jars from last year’s canning season, but a variety of reclaimed glass jars or decorative tins would also suffice. Next » Add to the mixture a capful or so of whatever essential oils you prefer. In my furniture polish, I often add tea tree oil and cedar or pine oils, but I rarely add essential oils to the polish that I use on my children’s toys. Stir the mixture well, or–even better–fasten the lid tightly and give the whole thing a very good shaking. You can stir or shake again a couple of minutes later, but the beeswax solidifies so quickly that it will likely be unnecessary. To apply the polish, use your hands to rub it into the wood, then come back an hour later and buff the wood well with a clean cotton cloth. You can see in the photo how drastically the polish changes the appearance of our beat-up but very beloved antique library table, which is witness to 3+ meals, two hours of schoolwork, and several messy craft projects every day.