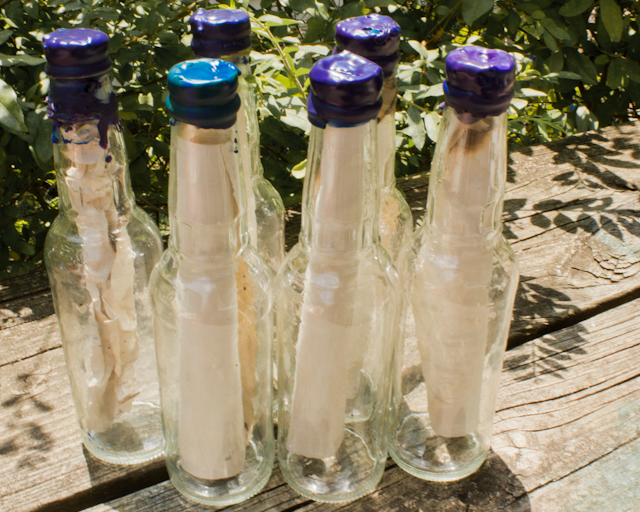
A message in a bottle makes a fun invitation for a pirate- or ocean-themed party. You can make this invitation almost entirely out of upcycled materials, and yes–you can mail it!
There are several components to this project that make it special, so start working on it on a Saturday with plans to mail it on Monday. 1. Prepare the glass bottles. Any color glass bottle will work, but the labels and sticky glue must be removed. Use my tutorial on removing labels from glass jars to get off every trace of paper and glue, and to clean out the insides of the bottles at the same time. Allow plenty of time for the glass bottles to dry completely, up to an entire day in the sun. And if you’re planning on mailing these, go ahead and skip down to the final paragraph of my tutorial real quick to see if you might rather use plastic bottles instead of glass.
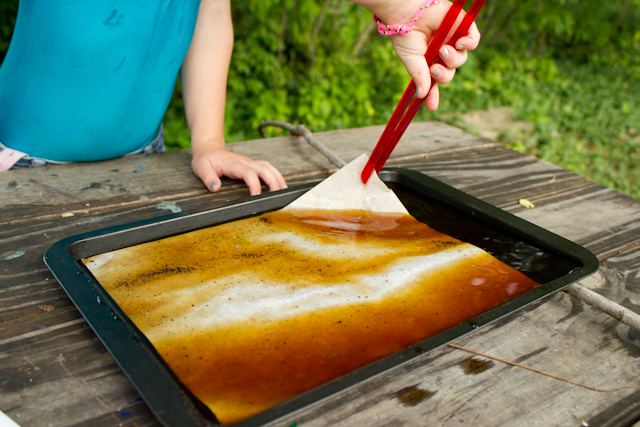
Antique the paper invitations. Age your invitations using my tutorial on coffee staining paper; the paper for the invitations is the only component of this project that isn’t upcycled, but with some creativity, you could certainly figure out a way to make even this part recycled!
Char the edges of the paper. Char a few selected spots along the edges of the invitation exactly how you’d expect to–by holding it up to a lit candle! Warning: the paper will burn like…well, paper!…so as soon as it begins to char, be ready to blow out the flame and thump the charred edge with a very slightly damp cloth to put out all the hot spots. If you’re afraid of fire but not afraid of chemicals, you can also char paper using ammonium chloride and a heat gun. (And yes, one of my kiddos made this rolled beeswax candle–she thinks that green and pink are just lovely together!) Next »
Put the message in the bottle. Just roll it up and stuff it in–how to get the message OUT of the bottle will be somebody else’s problem.
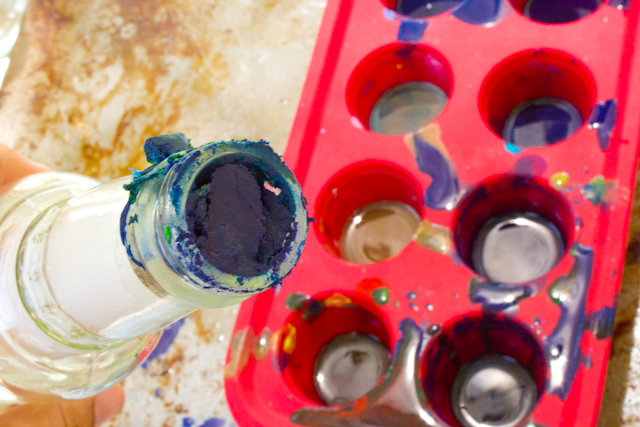
Seal the bottle using crayon wax. Follow my tutorial on making upcycled crayons, but take the crayons out of the oven when they’re only mushy, NOT melted. Using a popsicle stick, scrape up the mushy crayon and use it to stuff the opening of the bottles full. It won’t look cute or exceptionally sturdy, but you’re not going to stop here. Instead, put the crayons back in the oven and let them get completely melted this time. When they’re melted, remove them again from the oven, and dip the bottle openings into the liquid crayon. You’ll notice that the melted crayon will begin to cover the opening and the top edges of the bottle, forming an attractive seal; dip the bottles as many times as you’d like to attain the perfect look and the perfect strong seal (If you try to simply dip the bottles into the melted crayon without sealing them with mushy crayons first, the crayon wax will never cover the opening of the bottle). Obviously, these bottles are best hand-delivered; we’re fond of the doorbell ditch method of delivering even conventional invitations, because we like to save the postage, but mailing a message in a bottle is spendy…but do-able! To mail a glass bottle, just stuff it in a box, pad it with crumpled newspapers, and mark the box as fragile. If you plan to mail more than one or two, however, then consider using a plastic bottle for your project, instead of glass–it’s still upcycling, it will be a LOT cheaper to mail, and you won’t even have to box it.