Don’t let a busted pocket mean the end for your favorite garment. You can repair instead of replacing with one simple stitch!
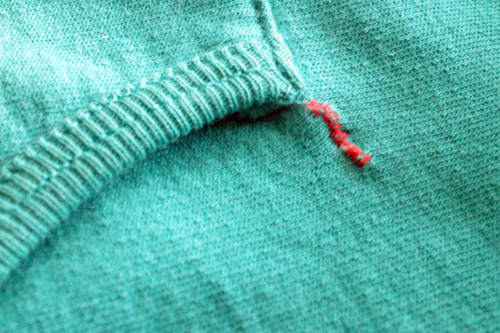
It happens to all of us sometimes, right? We load down our pockets each day, and after a while, the poor things just can’t take it anymore! Don’t fret, though! That pesky pocket doesn’t have to mean the death of your favorite skirt, pants, or hoodie. Armed with a simple whip stitch, you can re-attach your pocket lickety split. As you can see in the photo above, I totally abused my favorite hoodie, and the pocket tore away, ripping some of the hoodie when it went. I used bright red thread to repair the busted pocket, but if I’d gone for teal, you’d hardly be able to see this mending job at all. Even if sewing’s not your thing, you can totally do a whip stitch – it’s that simple! All that you need are a needle and thread. Here’s a video that shows you how to do a simple whip stitch: Usually when I have a pocket give out, it’s one of the top corners that starts to separate first, but you can use a whip stitch to repair the pocket no matter where it gives out. It will also work for mending a busted seam – just make sure you match your thread color to the fabric color, so that your repair will be almost invisible. Here’s what you need to mend with a whip stitch:
Garment with a separated pocket or busted seam Hand sewing needle Thread in a coordinating color or a contrasting color
If you want your repair to be invisible, choose a coordinating thread. If you want to show off your mending skillz, pick a contrasting color, so that it will really pop! Here’s how to mend your pocket or busted seam: Have you guys done any mending lately? I’d love to hear your clothing repair adventures in the comments!