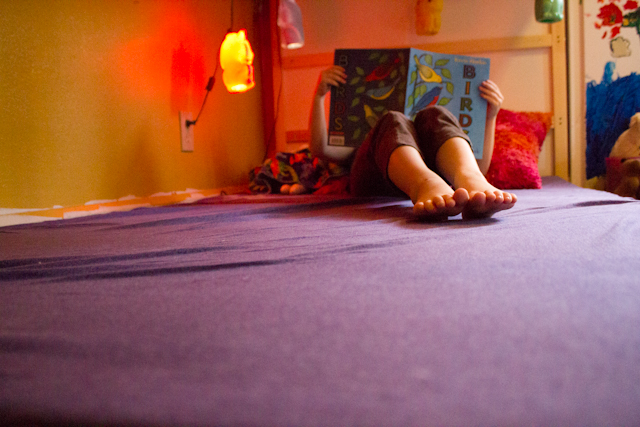
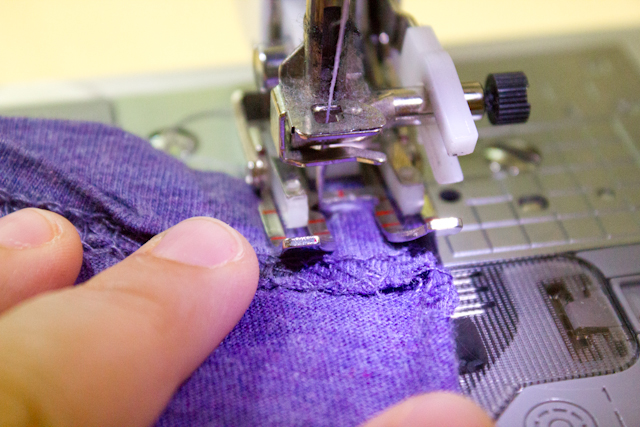
Although this method of resizing a fitted sheet to fit a smaller bed is a little more complicated than my quick-and-dirty tutorial for turning a flat sheet into a fitted sheet for the same bed size, it’s still a simple process that allows you to save money by using what you own instead of buying new. Here’s how to do it: Before you begin, examine the fitted sheet that you’d like to re-size. If it’s worn-looking, or has any holes, then you may want to put your energy into something that has more life left in it. Also pay attention to fabric–you’ll be cutting at least three sides to trim them (and possibly all four!), so I prefer to use jersey knit sheets for this project, since the cut edges won’t ravel and thus don’t need to be hemmed. If you choose any other fabric for your re-sizing project, remember to add your favorite seam allowance to your measurements, so that you can hem the cut edges. To prepare the sheet for resizing, cut away any elastic, and cut the seam that forms the pocket at each corner of the sheet. Iron the sheet, then lay it flat on your floor and measure its dimensions–I do have a list of standard sheet sizes and yardages, but after dozens of washes, your sheet may no longer be the exact size that it came as. Also measure your new mattress, in both length and width and depth. For instance, my daughters’ new bunk bed mattresses are 37″x75″x4″. Double the depth measurement, add 2″ so that you’ll be able to tuck the edges of the fitted sheet under the mattress, and add that number to both the length and the width to calculate the dimensions of the fabric that you’ll cut from the larger fitted sheet; my cut is 47″x85″. Figure out the layout of your cut on the larger sheet before you begin; the dimensions of my full-size fitted sheet, for example, allow me to cut two bunk bed fitted sheets AND two pillowcases from it, but only if I’m very careful. If possible, work starting at one finished edge of the larger sheet, both because it’s nice to have that edge already hemmed, and because even if your sheet is in good shape, you still want to avoid the middle, which is bound to be more worn than the edges, as much as possible. After you’ve cut out the smaller sheet size, again use the depth measurement of your mattress, add 1″, and cut a square, with each edge the length of that number, from each corner of the smaller sheet. My bunk bed mattresses are 4″ deep, so I cut a square with sides of 5″ from each corner of my sheet. Sew these cut edges, right sides together, on each corner to form the sheet’s pockets.
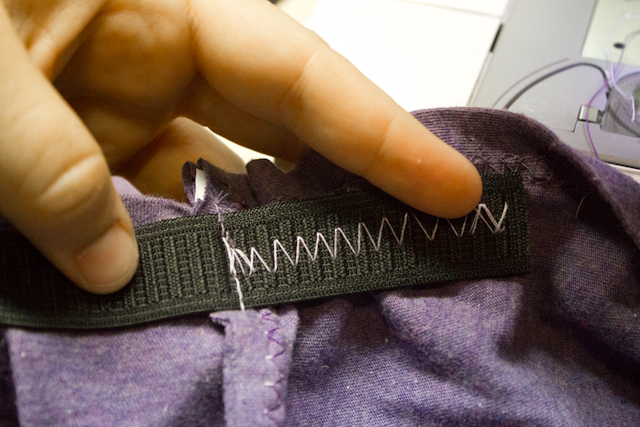
Cut four pieces of elastic, 6″ or so long and around 1/2″ wide (the length and size of this elastic isn’t set in stone, however, so feel free to do some stash-busting). Center the elastic on the seam that forms each pocket and sew it down, then stretch it as you zig-zag stitch it along the hem, working from the stitched-down middle to the ends of the elastic. When you’re finished, the elastic will give the pockets grip, and the sheet will have made a perfect transition from its larger old bed to its smaller new bed.