Really, once you start using cloth pads, they’re no more gross than paper ones. And unlike paper pads, all of those used menstrual products don’t pile up in a landfill, which in my opinion is way more gross than a reusable pad that you wash in the machine!
Using a Cloth Pad
You can basically treat your cloth pads like paper ones in a lot of ways. Keep one stashed in your purse – you can even get cute carrying cases for them! – when you change your pad while you’re out and about, just slip the used one in the carrying case to wash when you get home. Cloth pads will get stained with use. If you’re OK with that, just give them a rinse when you change your pad at home, and toss them right in the hamper or machine. I tend to toss my used cloth pads directly into the washer, so they won’t stain my clothes in the hamper. If you want to prevent stains, you can soak them after use in water with a little lemon juice and salt, then was as usual. I find cloth pads much more comfortable than their cotton or paper cousins. They don’t feel so much like wearing a giant diaper, and unlike paper pads, they don’t fall apart on you if you go a little too long without changing them. The snap-together wings on a cloth pad are also a lot more reliable than the sticky wings on a paper one. Don’t you hate how the wings on paper pads bunch up if you don’t stick them just so?
DIY Cloth Pads
Materials
paper or cotton pad with wings that you like the size and shape of reclaimed t-shirt reclaimed dish rag or towel (clean, of course!) sewing machine, thread, pins, iron small snaps and snap kit
Directions
That disposable pad is your pattern, so carefully open it up and trace the shape onto your t-shirt material and your rag or towel. If you’re careful not to remove the tabs that cover the sticky part, you can stash that pad away for an emergency.
Cut two pad shapes out of your t-shirt and one out of your towel. Cut one more pad shape out of the towel, but leave the wings off of this last piece.
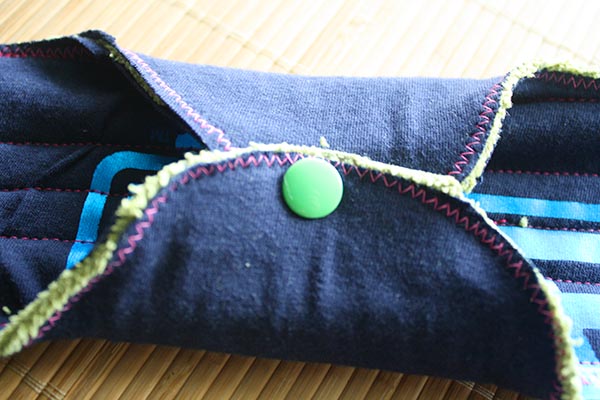
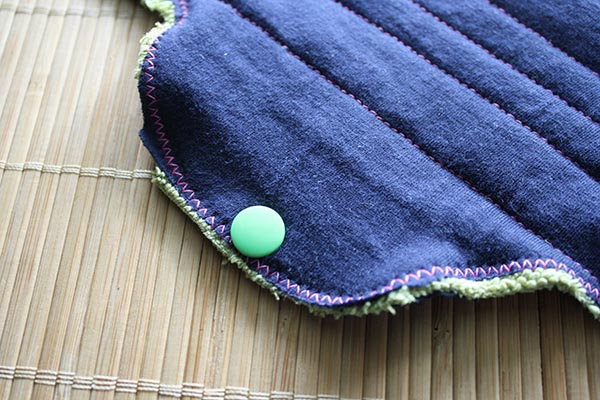
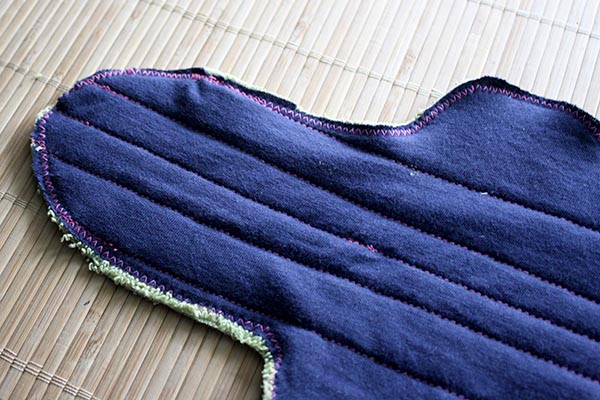
Iron all of your pieces, and layer them up like this: t-shirt piece on the bottom, towel with wings, towel without wings, second t-shirt piece on top. Pin everything in place.
Use a serger or your sewing machine’s zig-zag stitch to sew all the way around the outside of your pad.
Use a straight stitch to quilt the middle of your pad. This will secure the extra padding in place. You don’t have to do a ton of quilting: 4-5 rows of stitches are fine.
Iron your pad, add your snaps, and you’re all set! Want to make more disposable menstrual products? Julie’s got a great roundup of DIY projects just for your period!