I have just finished making an entire stack of freakin’ AWESOME Valentines for my Valentine’s Classroom Card Exchange swap over at Craftster, and the last thing I intend to do with them is stick them into a bunch of boring, mass-market, chlorine bleached, old-growth forest envelopes. And also? I made my Valentines weird sizes. I am a crafty chick, however, and as my friend Autumn says, happiness IS recycling folded paper, so I’m going to take this atlas I found dumpster-diving, in which the Berlin Wall (Boo!) and Tibet (Yay!) are both alive and well, and I’m going to fold some pages into rockin’ envelopes to house all my many missives to all my many Internet sweeties (You out there, superhooker? Pumpkinbear says hi!). Why don’t you give your own sweetie a smile and craft along with me?
How to Make Envelopes in Custom Sizes
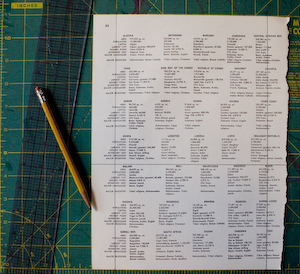
You will need: A card or letter to mail (my Valentines are 4″x6″ cardstock, with a floofy tinsel border); a pretty cool piece of paper to recycle that is any amount wider than your card or letter and any amount greater than twice as high (my atlas pages are a standard 8.5″x11″); ruler, pencil, white glue. Bonus points for a gridded cutting mat that will help you rule straight lines.
- Decide how roomy you want your envelope to be, and do some math. Because of my floofy tinsel, I want my envelope to end up more like 4.5″x6.5″. If you plan to mail something pretty thick or bumpy, you might want a roomy envelope, too. Lay your paper down with what you want to be the inside of your envelope facing up.
- Subtract your envelope’s finished width (in my case, 6.5″) from your paper’s width (in my case, 8.5″) to find out how much extra width you have (in my case, 2″). Now divide that extra width by 2 (in my case, equalling 1″). Measure in that amount on both sides of your paper, and draw a line right there from top to bottom, pressing down hard with your pencil to make it easier to fold later.
- From the bottom of your paper, measure up to your envelope’s finished height (in my case, 4.5″) and draw a line right there from left to right, pressing down hard with your pencil.
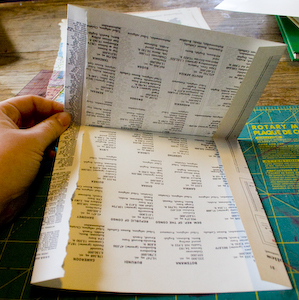
- Fold down to the inside (but don’t glue) the left and right folds.
- Fold down to the inside the line that you drew to mark the height of your envelope. Glue it down on both sides only along those left and right folds, and let it dry.
- Stuff your envelope, and seal the flap with a glue stick, rubber cement, some stickers, or, of course, a kiss. Are you sending handmade Valentines this year?