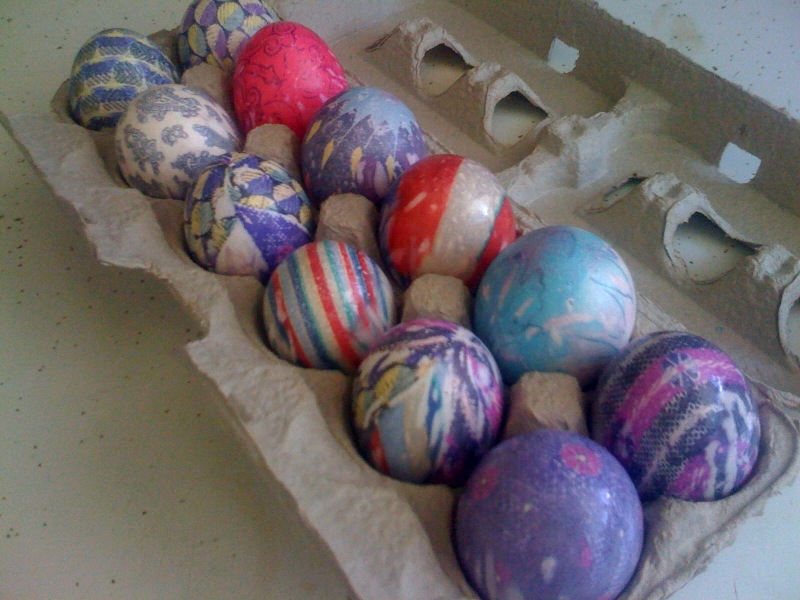
We used the large end of the ties to cut out a large swatch to cover an egg, but we saw a lot of waste with the rest of the tie. To use up the remaining skinny part of the tie we cut strips to wrap around the eggs. This resulted in alternating colors and patterns around the egg…a truly stunning effect. Keep reading to find out how we did it. Step by Step for Silk Strip Dyed Eggs: Tips for vibrant, shiny eggs:
Use 100% silk fabric with saturated color, bright and bold patterns Boil and then simmer for at least 20 minutes, for better color saturation boil for 40 minutes or more (if you don’t plan on eating the egg) Wrap egg tightly in silk to prevent white spots. For solid color or less interesting silk prints, wrap the egg loosely so parts of the egg remain white after dying causing a marbled effect (like on the red egg in the bowl above). Try putting wrong side of woven silk against egg. Inthe picture to the right, the two eggs on the left came from the same piece of fabric and two on the right came from the same piece of fabric. Rub finished eggs with vegetable oil to make them shiny. We also discovered it is best to keep red/purple eggs in a separate pot from lighter colors. The strong red and purple dyes will even bleed through the white cloths. Save your silk swatches for next year – they can all be reused to dye more eggs.